Developing on your local computer is dead.
At least that's the dream.
My experiments over the weekend got me significantly closer to that dream, thanks to the smart pivot that the folks at coder have made.
Coder started out building a web application that provides a development experience that looks and (mostly) works like VS Code. But it is cobbled by the browser intercepting certain keyboard shortcuts and Microsoft's refusal to let third parties install VS Code extensions. Running VS Code in the browser is cool, but if I can't install all my favorite extensions it's dead on arrival. Some extensions are cross-listed on the Open VSX registry, but not enough of them to make me happy.
Recently, Coder made a brilliant pivot from repackaging VS Code as a web app to provisioning remote development environments with a great devops flavored workflow. They still offer their browser-based experience, but they've built a new open source service that uses Terraform templates to provision on-demand development instances for you and your team.
This move is particularly brilliant because Terraform enables them to support nearly every cloud provider, as well as container and virtual machine environments.
Requirements
In order to get this magic you need a server to operate as your control plane, and access to compute resources... cloud instances, docker, LXC, etc.
You will also need one or more templates to specify how Coder will provision your workspace. I ended up with three templates:
- Docker - run my workspace on a cloud VM inside a docker container
- AWS EC2 - create a new EC2 instance for my workspace
- LXD - run my workspace in an LXC container my headless Pop! OS workstation
Don't worry, I'll share these templates a bit later so you can get some of this sweet, sweet cloud development action.
The Controller
For lack of a better term, I'm calling the computer that performs the management of your environments the "controller". Maybe they have a better name for it in the docs, I should probably read them.
Your controller can live anywhere with access to the API that terraform will call to provision your development environments. This is important to note if you're provisioning something behind a firewall – like my LXD server – your controller needs to be able to access it.
Installation
Once you've worked out where you are going to install the controller, installation is pretty straightforward, but there are a few configuration issues that have ramifications later. I'm going to focus on a setup that's good for me as a single developer. You may want to alter your decisions based on your specific needs.
Questions to answer before you start:
Docker
If you intend to use Docker you should install it on your controller now. You'll need to perform a few extra steps during installation to make everything work, so have Docker installed first to make your life easier.
Access Method
Do you plan on exposing your controller with a public IP address and domain? If so you'll need to make sure the server the controller is running on is capable of exposing TCP port 443 at a minimum.
There are several different ways you can go about exposing the controller, but they all boil down to these two things: the provisioned environments need to contact the controller over HTTP, and the client (your laptop, iPad, desktop etc) will need to connect over HTTP. So the controller needs to be reachable by both the environments and the clients.
Coder has your back if you don't want to expose your controller over the Internet. You can use their tunneling service which will set up an external at *.try.coder.app. I would rather not have any of my traffic going through someone else's servers, even if it is encrypted, so I chose to expose my server directly. In that case, I'll need a public IP address and a domain name. I used Terraform to provision a small EC2 instance and exposed port 80 and 443 in the security group.
Installing Caddy
I used Ubuntu server, so I installed using Caddy's apt repository. It installs the binary, creates a system service and starts the server. Now's a good time to go to your domain registrar and add a domain or subdomain to use for your controller. I picked the creative and unique domain code.brian.dev because I like to be original. I created a DNS A record that points to the public IP address of my EC2 instance. We can continue with the installation while DNS records propagate across the internets.
Installing Coder
Follow the installation guide. I used the system packages for Ubuntu on Coder's GitHub download page. Then I followed the directions to run coder as a system service. The first step in their instructions tell you to edit /etc/coder.d/coder.env to specify whether you're using a tunnel, or specify your external access URL. Here's mine:
# Run "coder server --help" for flag information.
CODER_ACCESS_URL=https://code.brian.dev
CODER_ADDRESS=
CODER_PG_CONNECTION_URL=
CODER_TLS_CERT_FILE=
CODER_TLS_ENABLE=
CODER_TLS_KEY_FILE=
# Generate a unique *.try.coder.app access URL
CODER_TUNNEL=false
Continue with the installation, enabling the service with systemctl and checking the logs with journalctl:
# Use systemd to start Coder now and on reboot
sudo systemctl enable --now coder
# View the logs to ensure a successful start
journalctl -u coder.service -b
If you're using your own domain, you won't be able to reach the server until you configure Caddy. Edit the Caddyfile at /etc/caddy/Caddyfile. Replace the default contents with a reverse proxy setup for your chosen domain name:
coder.your.domain {
 reverse_proxy localhost:3000
}
Make sure you change the domain name to be the one you chose when you configured DNS. Save the file and restart caddy:
sudo systemctl restart caddy && sudo journalctl -f -u caddy
Watch the logs to make sure that the domain name resolved properly and caddy was successful in provisioning a Let's Encrypt certificate. If all is good you can proceed to create your admin account.
Use sudo journalctl -u coder to see the first few lines of output from the coder service. They'll have a URL with a token that you can use to create your first user.
coder[21590]:  Get started by creating the first user (in a new terminal):
coder[21590]:  coder login https://reallylongtokenurlwithyourdomain
You'll want to do that from your laptop/client computer. So if you haven't yet, go back to that installation guide and install the coder command line client for your operating system. I used the GitHub release downloads rather than the curl | bash method because I didn't want the installer creating a new coder server on my laptop. I'm not sure if that was overly cautious, but it worked fine. Once it's installed and moved somewhere in your path, you can create your first admin user:
coder login https://reallylongtokenurlwithyourdomain
Coder will open a web page and give you a token to paste into your terminal. From this you can do nearly everything from your laptop unless you're using Docker environments. Let's cover that quickly.
Docker + Coder
The coder service will need to be able to access the Docker socket on the server. The installation package for coder created a coder user for the service, so we need to allow that user access to the docker socket:
sudo usermod -aG docker coder
Then restart the coder service (sudo systemctl restart coder) just to make sure the change works.
We're on the home stretch now. The coder server is installed, the last step is to give it some templates to use when provisioning new development environments.
Templates
If you're new to Terraform, the templates will be the hardest part of this process. Fortunately there are many examples in the coder repository to get you started. I put mine on GitHub so you can use them or browse for inspiration.
Start by cloning the templates (mine or theirs) somewhere so you can edit them. Read the template documentation pretty carefully before you start so you can understand the concept of ephemeral and persistent resources. I'm a cheap guy and don't want to spend any more money than I have to so I wanted to make sure that when I stop a development environment I won't be paying any more than I have to. My EC2 template will use EBS for storage so I can stop the instance and only pay for the storage while the instance is offline. (starting and stopping Coder instances is super-quick from the web interface)
Once you've edited a template, you can push it to the server with the coder templates command. From inside a specific template directory run coder templates create. It will prompt you with some questions then push the templates to the server where they will be checked and stored for usage later.
If you're using Docker you're done. If you're using a cloud provider you'll need to carefully read the section about how to give the Coder daemon access to your cloud credentials so that it can call your provider's API to provision your infrastructure.
Read this carefully, and please -- please -- don't put your credentials in the Terraform files directly. I added mine as environment variables at the end of the /etc/coder.d/coder.env file. Worked perfectly!
Your First Workspace
Navigate to your coder access URL in a web browser, log in, then click on the Templates link at the top.
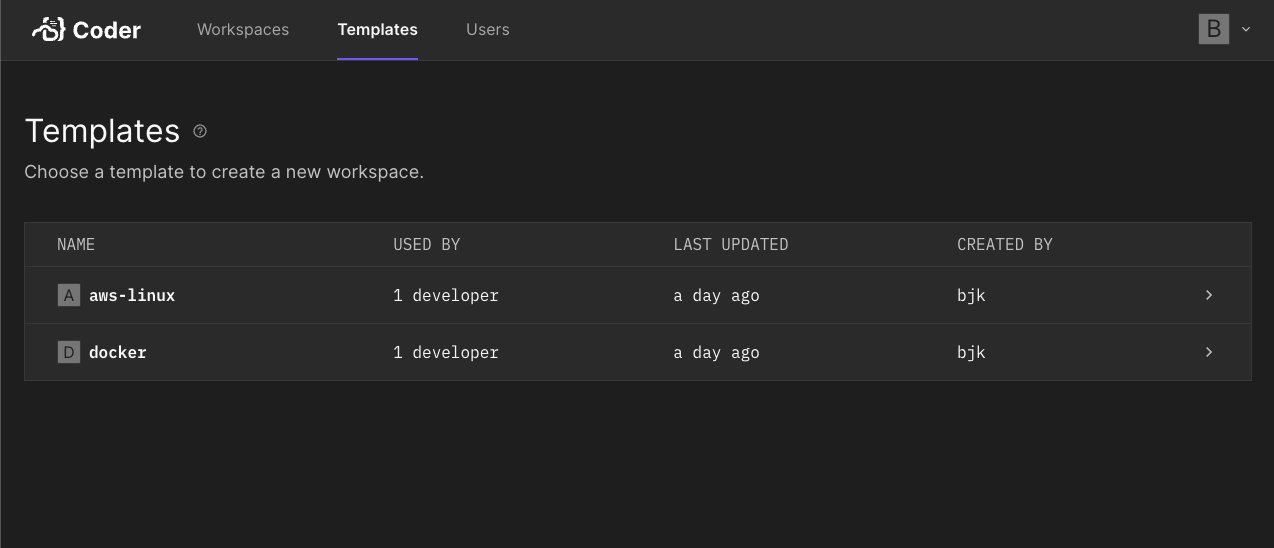
Choose your preferred template from the list by clicking on that row, then click on the Create workspace button at the top of the template detail page.

Give your workspace a name - maybe based on the project you'll be editing. If your terraform template has any variables you'll see prompts or input boxes for them in the create page. Click submit when you're done and watch the magic as coder provisions your development environment for you.
Connecting
Back at the Workspaces tab, click on the name of your workspace and make sure that you see that the coder agent is connected.
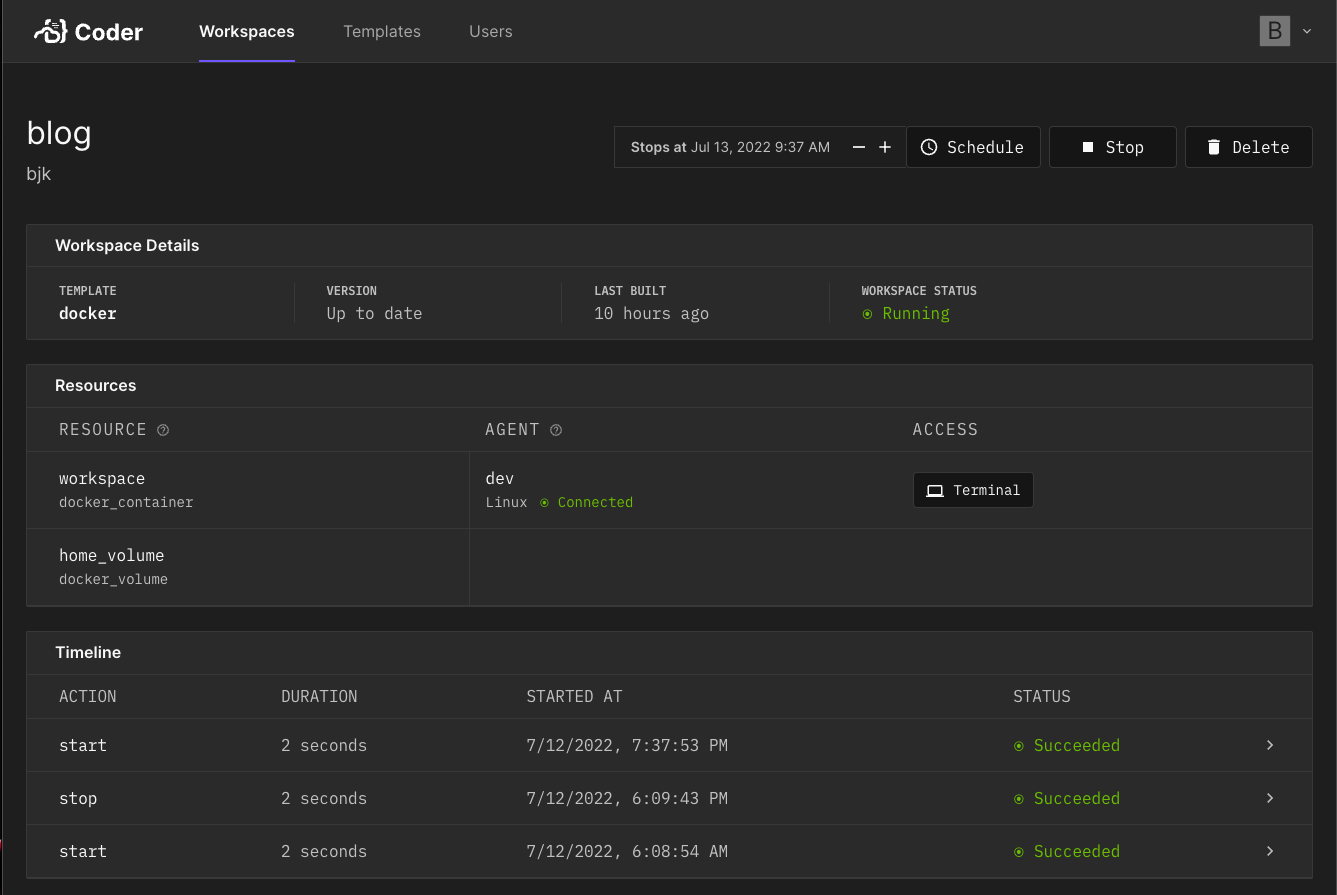
When it's ready, you can click on the little Terminal button to get a web based terminal login to your environment. This is the first smoke test to ensure everything worked well.
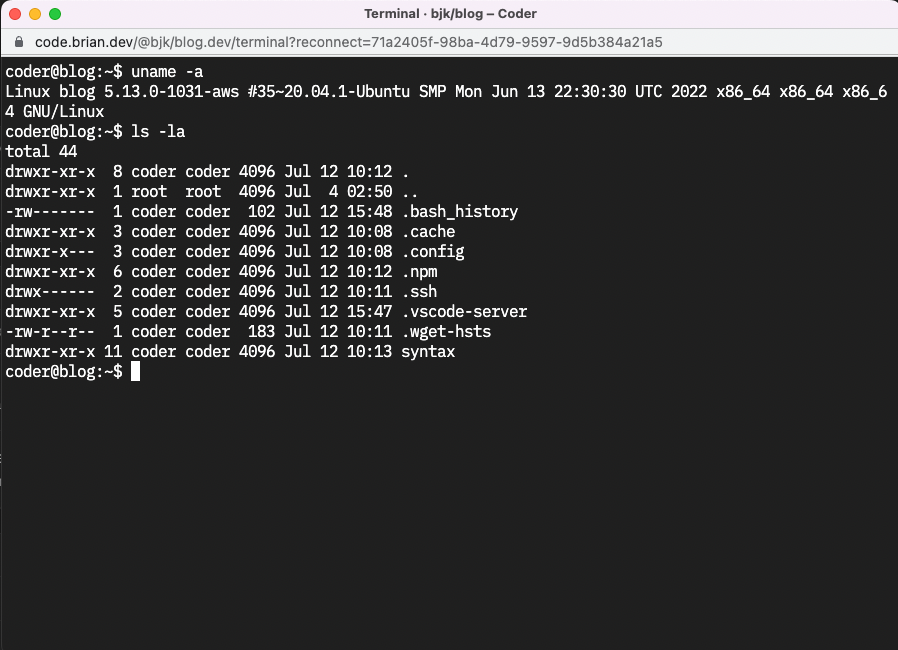
Awesome! You've got a terminal into your development environment. But you'll probably want to connect using something more robust. Coder has you covered there too. From your laptop, type this command:
coder config-ssh
The config-ssh command adds a section to your ~/.ssh/config with ssh connection information for your instances. The secret sauce is an ssh proxy that's run through the coder agent on your instance. Here's an example from my blog instance:
Host coder.blog
 HostName coder.blog
 ConnectTimeout=0
 StrictHostKeyChecking=no
 UserKnownHostsFile=/dev/null
 LogLevel ERROR
 ProxyCommand "/usr/local/bin/coder" --global-config "/Users/bjk/Library/Application Support/coderv2" ssh --stdio blog
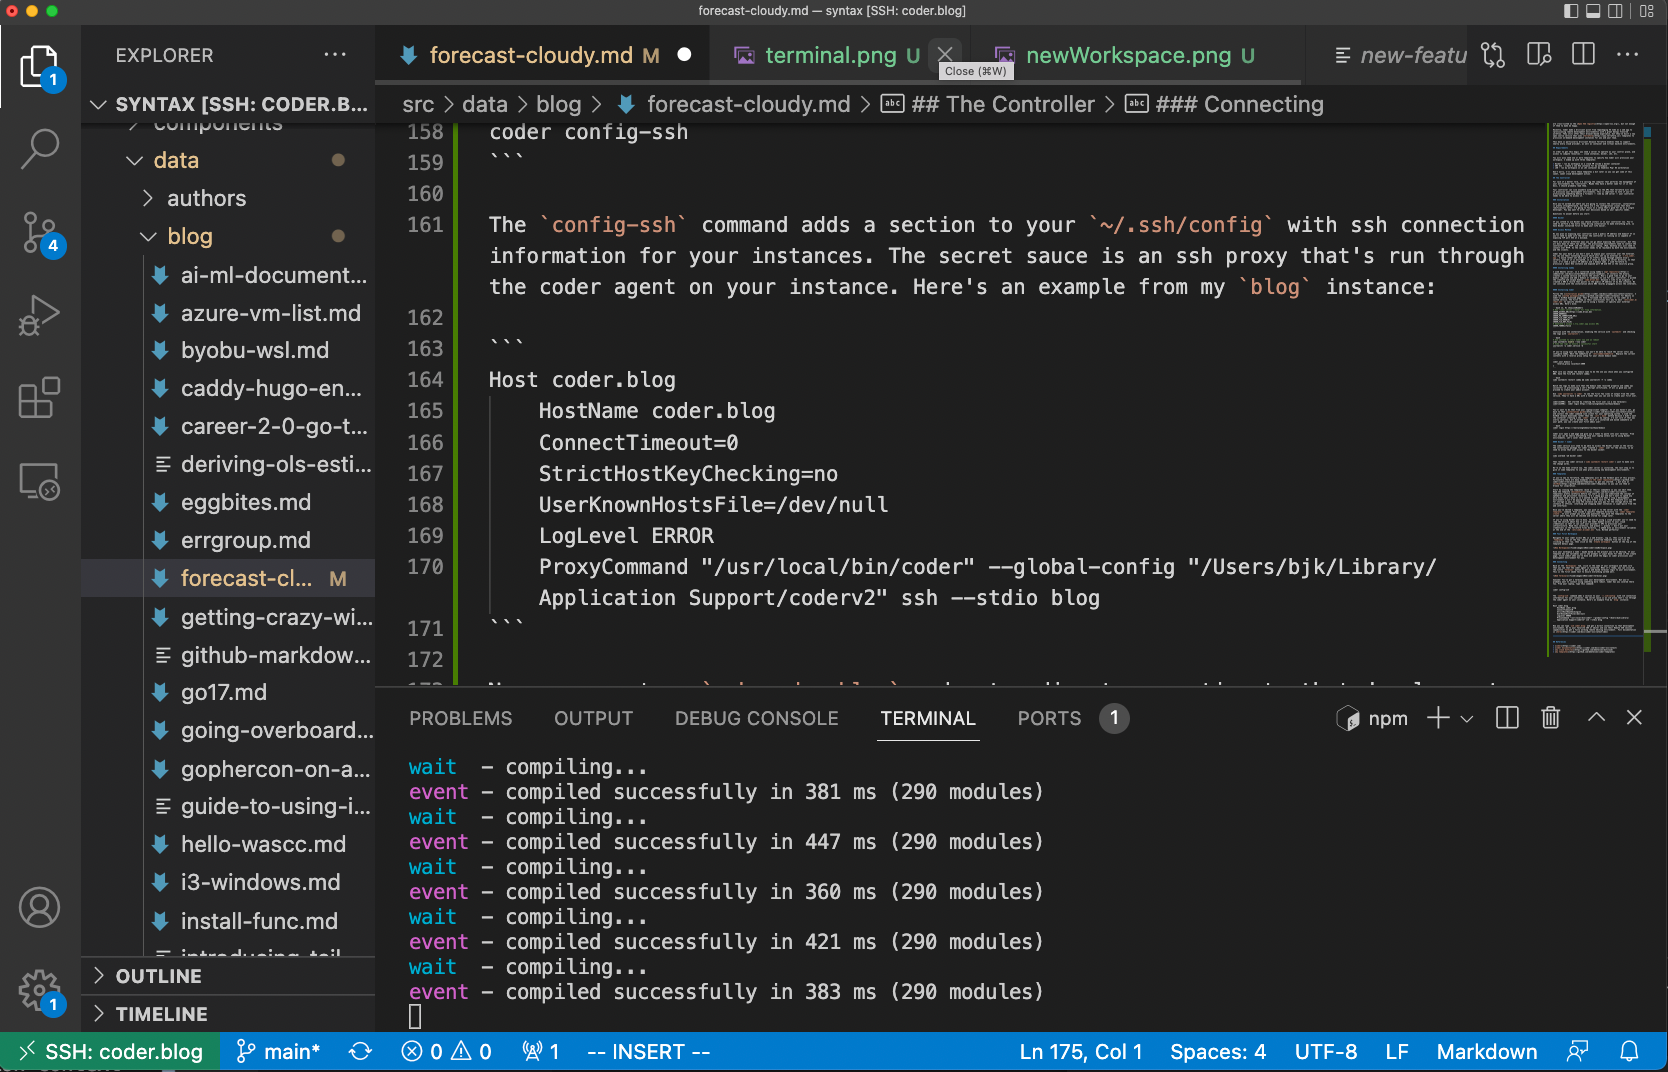
Now you can type ssh coder.blog and get a direct connection to that development environment. Go to your favorite IDE or editor and use their Remote SSH session capabilities to get a fully working remote editing environment. Full IDE documentation is here
Here's the mandatory meta-inception screen shot of me editing this blog post in a Docker container running on my coder server in us-east-1 from my laptop: